Phin Tim
(pronounced feen theem) Designed and manufactured a heart-shaped Vietnamese coffee filter. Phin Tim’s transliteration is “coffee filter heart.”
What I Did
Physical Product Realization
When I Did It
Jan. 2022 - Mar. 2022
Tools
CAD, metal bending, water jet cutting, TIG welding
Introduction
Growing up, my parents would brew cà phê sữa đá, or Vietnamese coffee, each morning. They didn’t drink it, though, but rather set it on our family altar for Ong Thô, a Vietnamese deity. This coffee was brewed using a phin, a Vietnamese coffee filter–traditionally round and small enough to create one single serving of coffee. When we would eat out at restaurants, my dad would always order cà phê sữa đá to drink even if he wasn’t craving coffee. I grew up drinking cà phê sữa đá like water, knowing all of the steps to brew a cup by the time I was 10. What I noticed, though, is that all of the coffee filters look the same. Phin Tim takes a traditional Vietnamese coffee filter and adds a funky twist.
Ideation
Parts
There are three components to the phin, each of which requires multiple metal parts:
Base of heart
Heart-shaped bottom plate (base of the phin)
2 curved metal side plates (sides of the phin)
Filter
Heart-shaped filter with holes
Metal handle
Lid
Heart-shaped plate (top of the lid)
2 curved metal side plates (sides of the lid)
Prototype
I created a prototype out of foam core. My main goal for the prototype was to make sure the holes of the Base cup fit within the perimeter of the glass opening.

CAD
Next, I created the CAD model for each of the three components to make sure that my dimension measurements aligned with the design.

Manufacturing Process
Sheet Metal Cutter + Slip Roller
I used four methods in making the phin:
Sheet Metal Cutter + Slip Roller
Waterjet Cutter
Lathe
TIG Welding
Additionally, I bought 24 inch x 36 inch 6061 aluminum sheets to cut all of my pieces from. 6061 is one of the food-safe aluminum types.
I used a sheet metal cutter to cut my aluminum sheets to the desired dimensions for each piece.
The first major problem I encountered involved bending my heart halves for the cup and lid of the coffee filter. My original design entailed using the slip roller to bend my aluminum sheet metal to the correct width. However, the smallest radius for the slip roller is 1 inch, and I needed a radius of 0.75 inch for my heart. So, I decided to create my own slip roller.
My design for this DIY slip roller involves welding a 1.5 inch diameter tube to a 1.5 inch square tube. By clamping the tubes onto a table, and inserting my sheet metal between the table and tubes, I can manually bend the metal. However, the flaw in this design was that the 1.5 inch diameter does not account for springback, so the actual diameter of the bent metal is larger than what I need. Furthermore, because both tubes are the same width, the sheet metal couldn’t bend all the way around the round tube. I recreated the slip roller, this time with a 1.25 inch diameter tube and a 0.5 inch square tube, which achieved my desired shape.

Waterjet Cutter
Because the phin requires precise dimensioning for the heart-shaped pieces, I used the Waterjet Cutter to cut these pieces from the aluminum sheet metal. There were three pieces cut using the Waterjet: the lid, the base, and the filter.

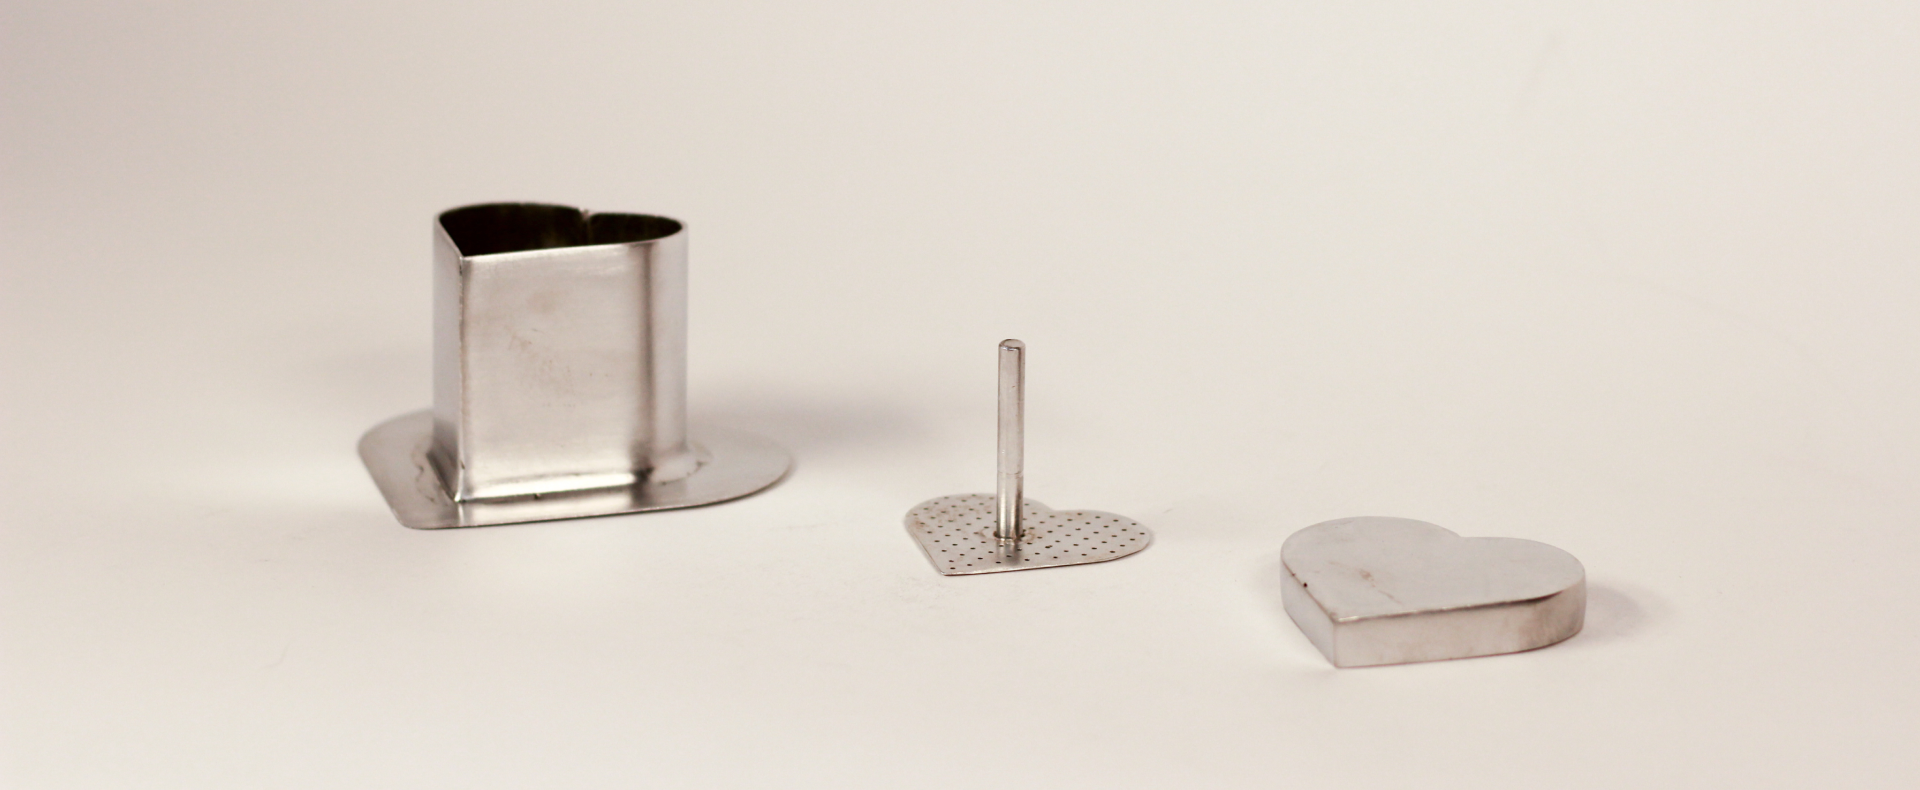
From left to right: lid, filter, slip-rolled base cup sides, base.
TIG Welding
The majority of this project consisted of TIG Welding. However, I ran into another obstacle: my 6061 aluminum pieces were not welding together. Most of my TIG welding practice at the beginning of my process involved steel instead of aluminum, which was a mistake. I didn’t realize that steel and aluminum behave very differently when they’re welded. My aluminum was melting too quickly, which didn’t give me enough time to create a puddle. After three weeks of welding practice, I talked to a fellow welder, who advised me to keep my amperage low (around 60-65) and my penetration level between 3 and 7. I took her advice and finally achieved a solid, even weld without melting.

I was regularly spending 24+ hours a week welding for my project. Needless to say, I was tired...

Sanding + Phinishing
When all of my pieces were welded, the last step was sanding the imperfections. The key areas I sanded were welded edges and any scratches on the metal.

Final Product
Even though there wasn’t a single part of my project that went according to plan, I realize that if I didn’t have obstacles along the way, I would not have learned as much as I did. I experienced the lowest lows and the highest highs making this phin. My hard work paid off, and I came away with a functional Vietnamese phin.


